Lacework API Quickstart
This topic helps you get started with the Lacework API. It describes how to set up your API keys in the Lacework Console and then guides you through a few simple API calls using Postman.
Prerequisites
The Lacework Postman workspace includes API request templates, environment settings, and a script that uses your API keys to obtain authentication bearer tokens needed by the API. To follow these steps, you'll fork the Lacework workspace collection and environment settings.
Before starting, make sure you have a Postman account.
Generate API Keys
To generate Lacework API keys, as an administrator in the Lacework Console:
- Log in to your Lacework account at Lacework Security.
- Go to Settings > Configuration > API keys.
- Click Add New.
- Enter a name for the key and an optional description.
- Click Save.
- Click the ellipsis (...) and download the generated API key file.
Now set up Postman.
Fork the Lacework Postman Environment
The environment contains the global environment variables for accessing the Lacework API. You can read more about environments in Postman’s setting up an environment with variables article.
Fork the Lacework environment as follows:
- Sign in to Postman and go to Lacework’s Postman Workspace.
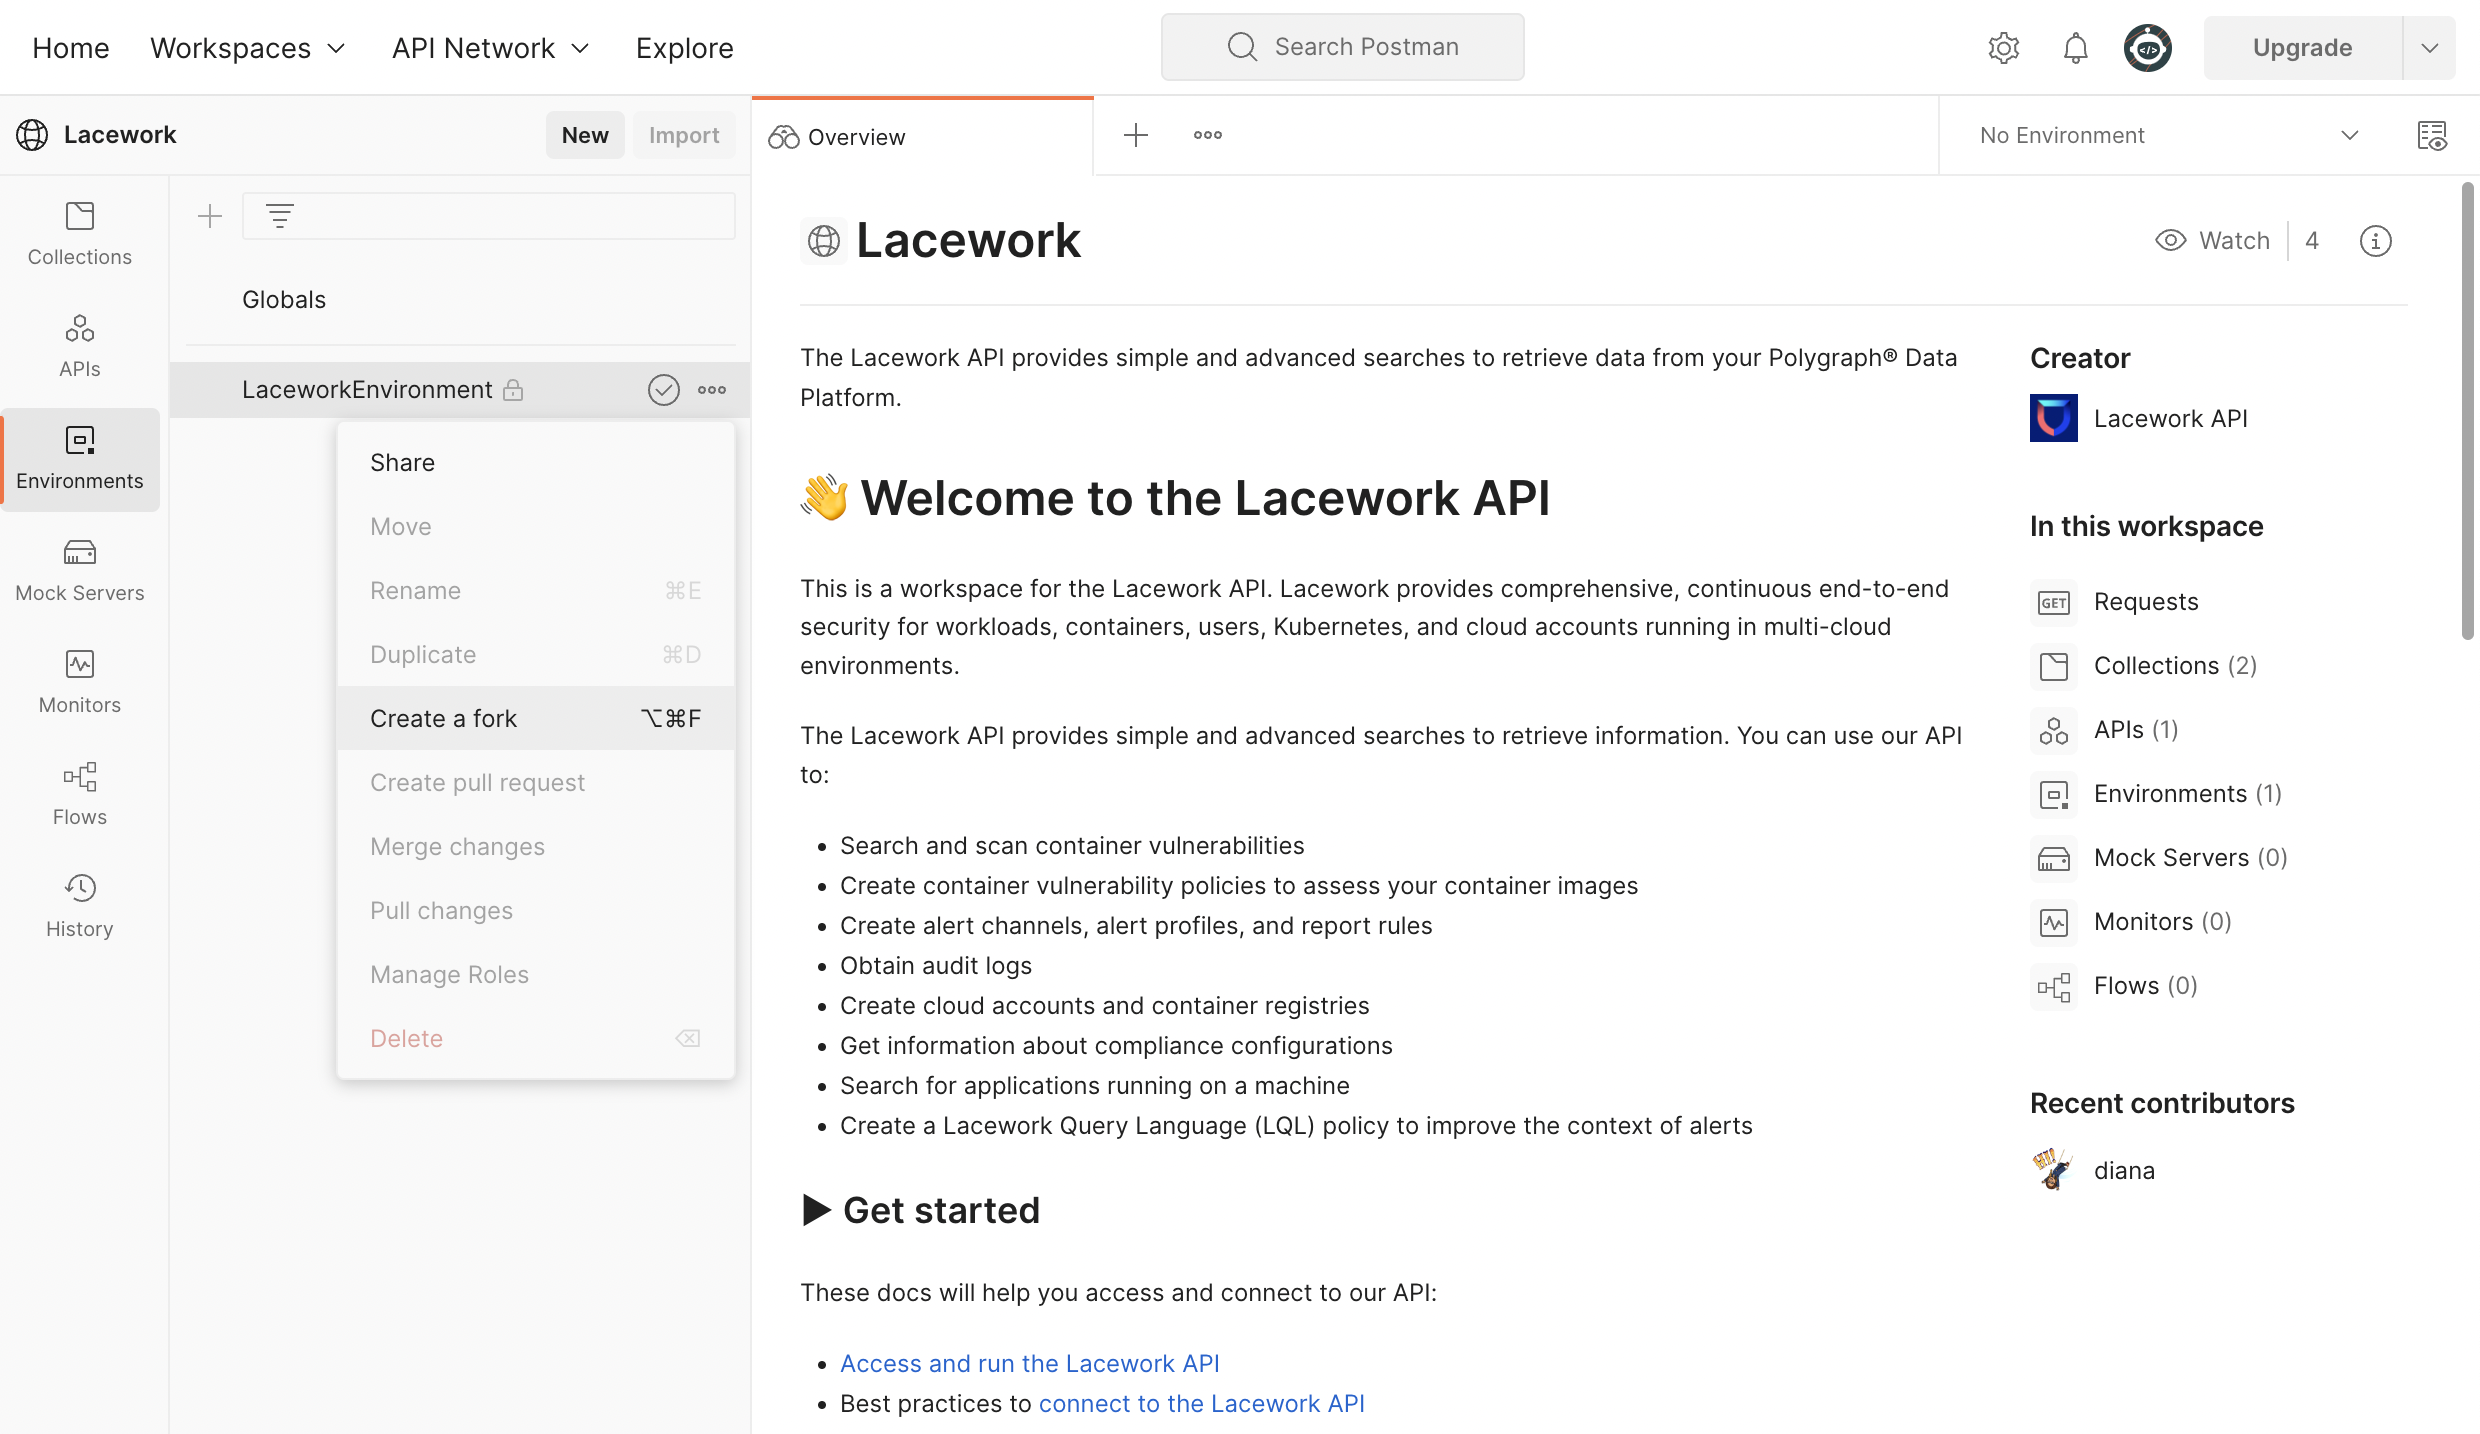
- Go to the Environments tab.
- Click the ellipsis (...) next to LaceworkEnvironment.
- Select Create a Fork from the menu, as shown below:
- Give your fork a name, such as My Lacework Environment.
- For the workspace, choose My Workspace.
- Click Fork Environment.
This creates a copy of the Lacework environment settings in your own workspace, which you can customize.
Fork the Lacework Postman Collection:
A Postman collection contains a set of requests for an API.
Fork the Lacework collection as follows:
Go to Lacework’s Postman Workspace.
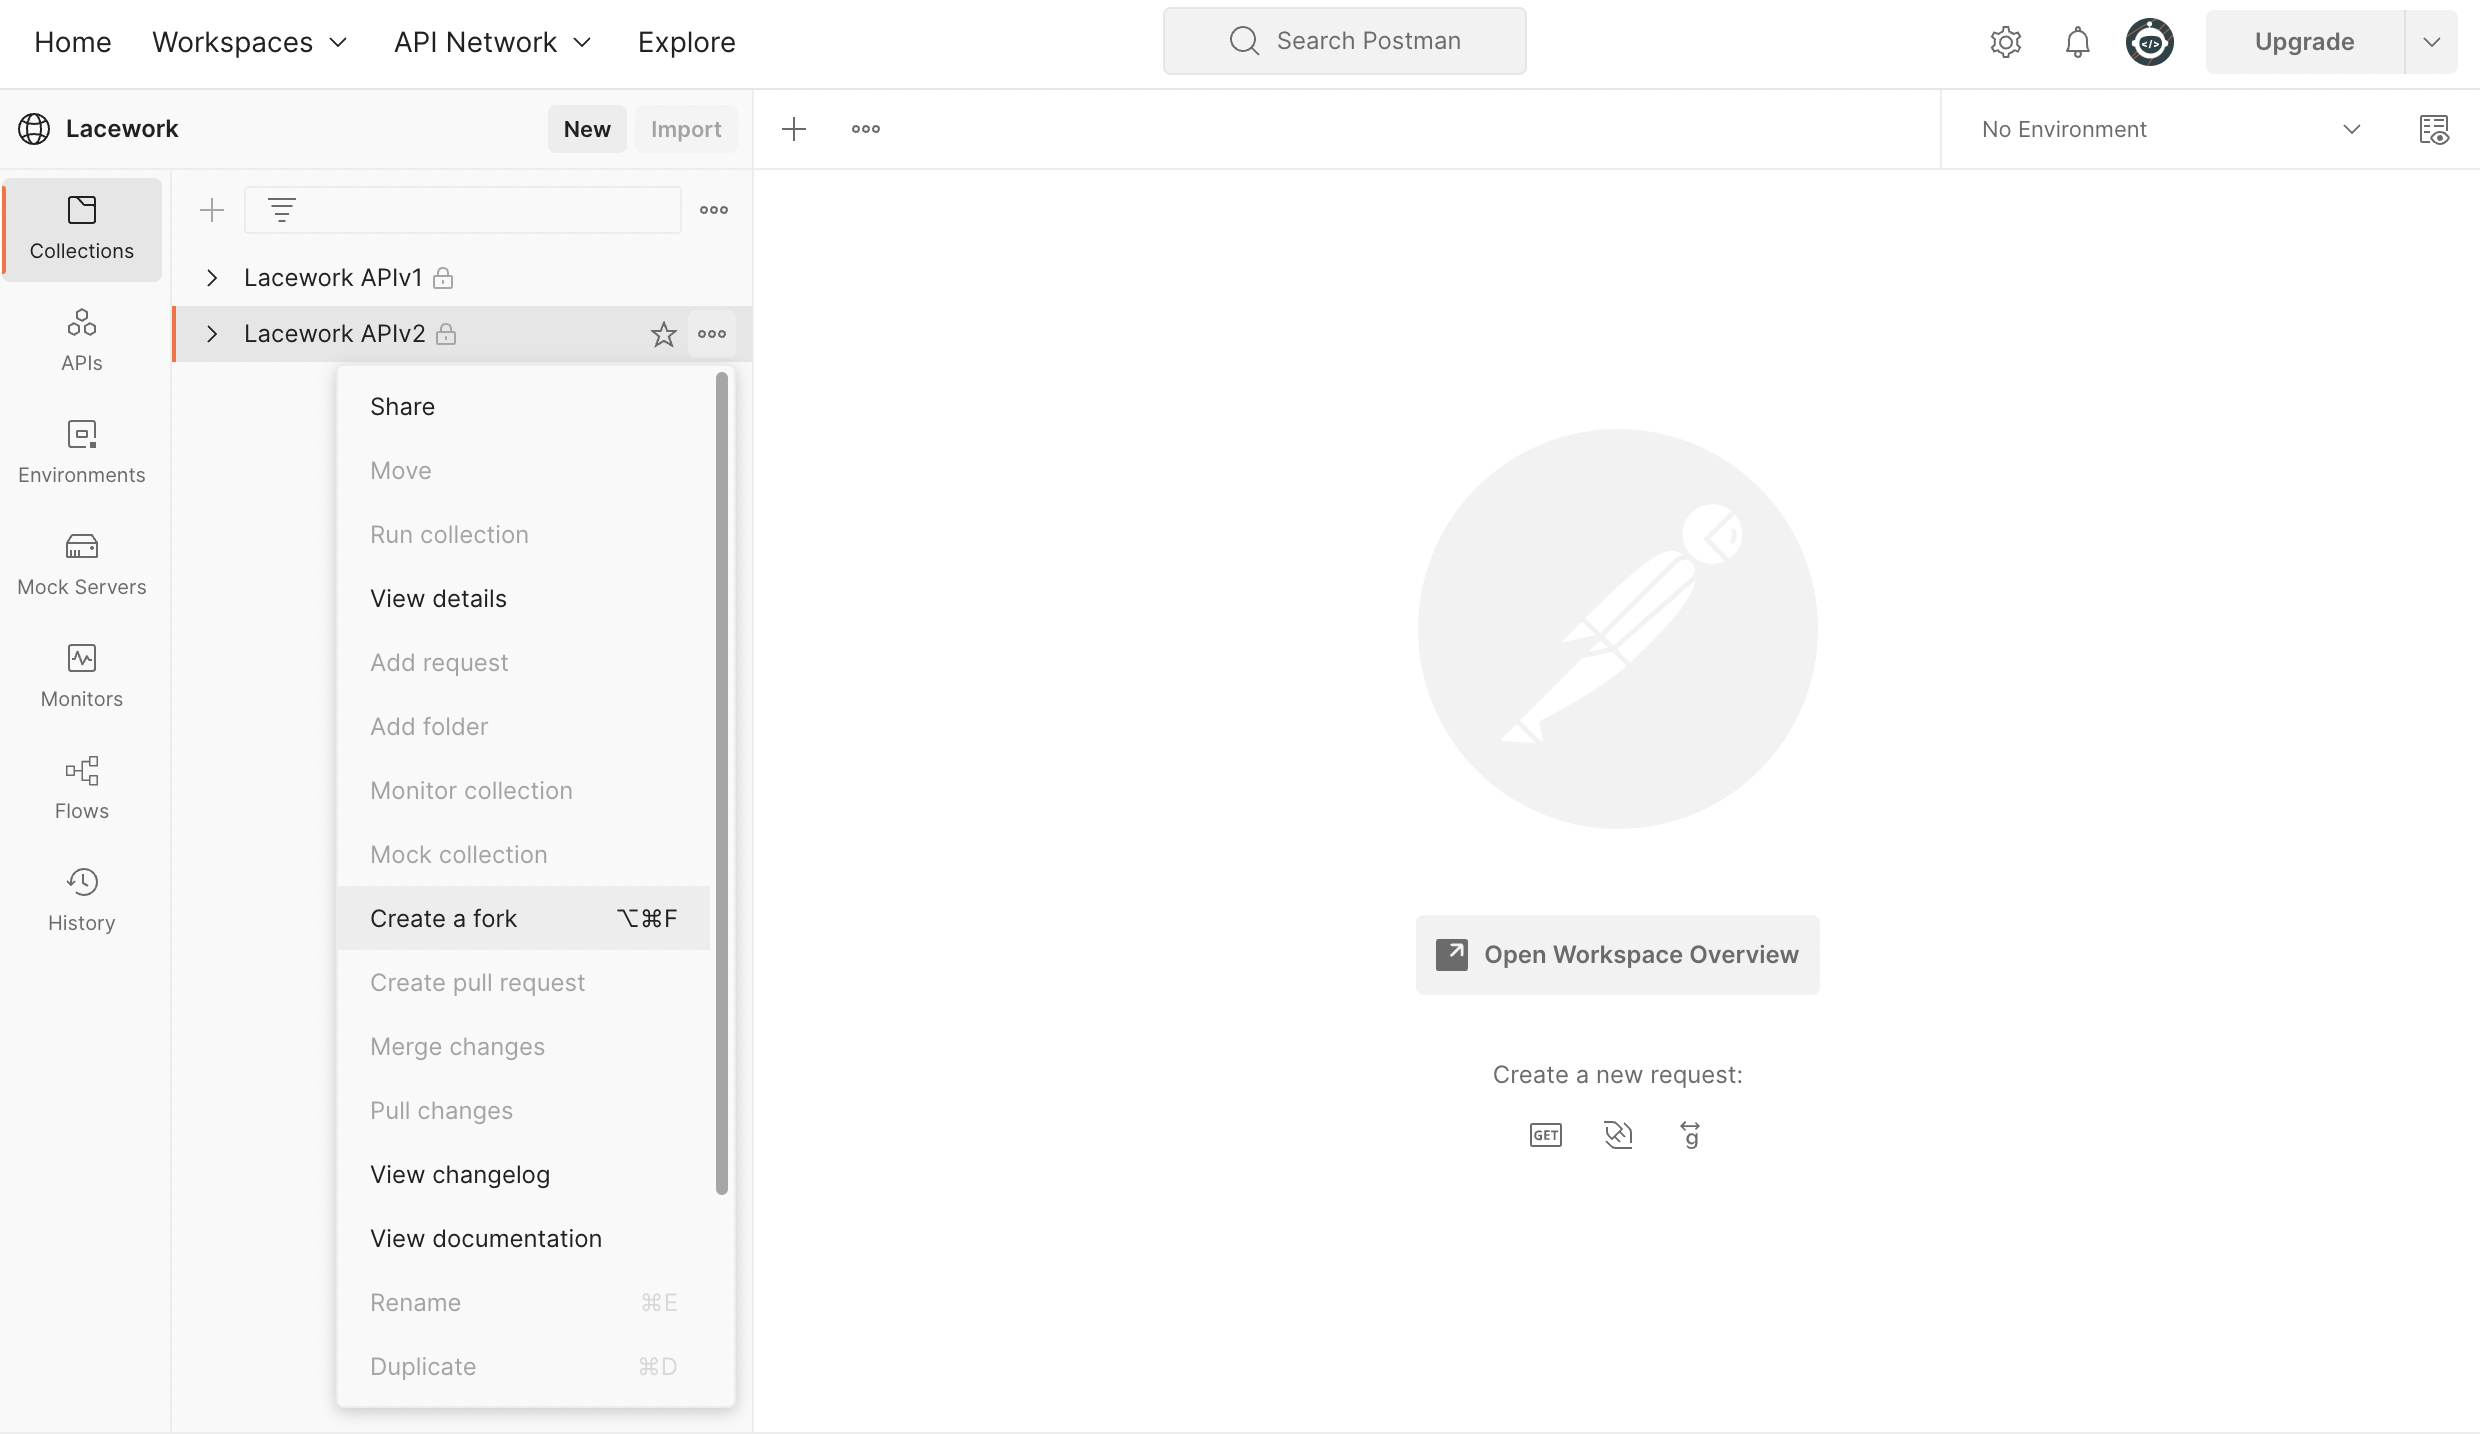
From the Collections tab, click the ellipsis (...) next to Lacework APIv2.
Select Create a Fork, as shown below:
Give your fork a name, such as My Lacework API.
For the workspace, choose My Workspace.
infoBe sure to leave the watch option enabled. By doing so, you’ll be notified when Lacework makes changes to the collection, which you can pull into your fork.
Click Fork Collection.
This creates a copy of the Lacework collection in your own workspace, which you will customize next.
Configure the Environment Configuration
Configure your Lacework environment variables using values in the Lacework API key file you downloaded:
Go to your Postman workspace and click the Environments tab.
Select LaceworkEnvironment.
Edit the following environment variables by copying the values from the Lacework API Key file you downloaded earlier:
- AccessKeyID:
keyIdvalue from your API key file. - SecretAccessKey:
secretvalue from your API key file. - baseUrl: Replace the URL, minus
https://, with theaccountvalue from your API key file.
To avoid errors, set the values for both the initial value and the current value for the
AccessKeyID,SecretAccessKey, andbaseUrl. Your configuration should look something like this: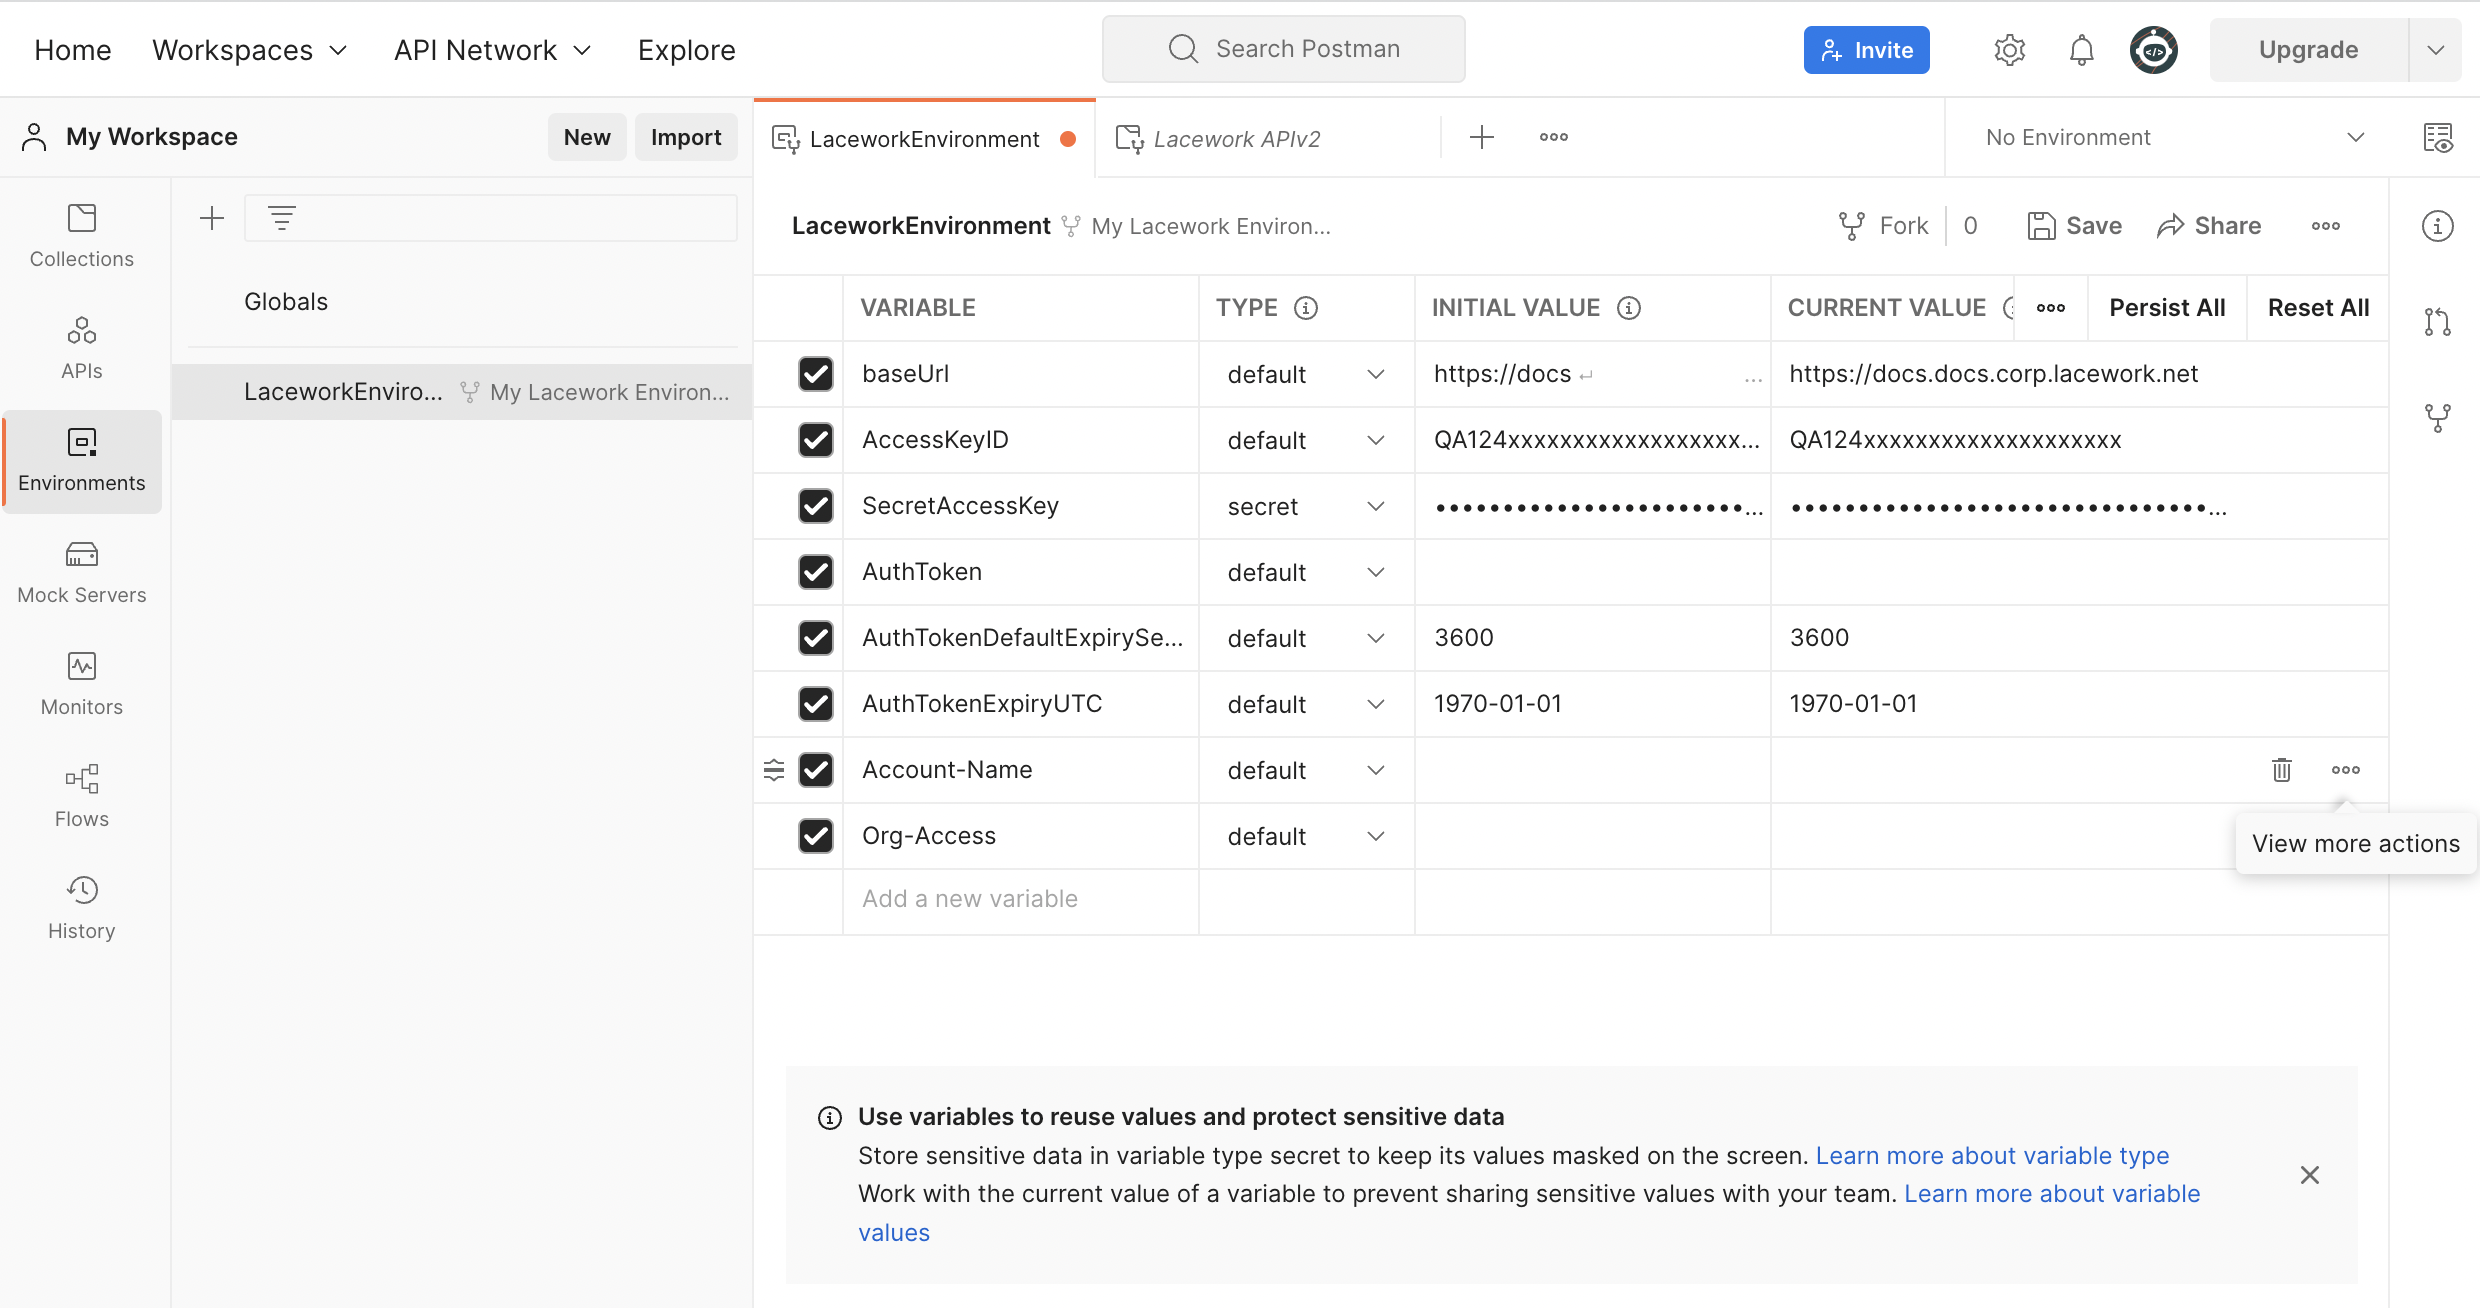
- AccessKeyID:
Click Save.
Next, make your first call to the Lacework API!
Send a Request
The UserProfile endpoint returns all sub-accounts in the addressed account.
In your Lacework collection, choose your custom environment from the top-right environment menu.
Expand the UserProfile API folder from the Lacework APIv2 tree and select List Sub-accounts.
Click Send.
Verify that the request results in a
200 OKstatus code and a response body like this one:{
"data": [
{
"username": "diana@lacework.net",
"orgAccount": true,
"url": "customerdemo.lacework.net",
"orgAdmin": true,
"orgUser": false,
"accounts": [
{
"admin": true,
"accountName": "CUSTOMERDEMO",
"custGuid": "CUSTOMER_721595854C42...",
"userGuid": "CUSTOMER_2FA43544DA84...",
"userEnabled": 1
}
]
}
]
}
Create an LQL Query
As a more advanced example, try using Query endpoints to create and run a custom query. Creating a custom query involves validating the proposed query, loading it in Lacework, and then executing it. Custom queries are useful for building custom policies and for performing ad hoc investigations.
Step 1: Validate the Query
Before attempting to load and execute a query, it's a good idea to validate it as follows:
In the Lacework APIv2 tree, navigate to the
POST Validate Queriesendpoint under the Queries folder in the Lacework APIv2 tree.Set the body of a request for the endpoint to the following:
{
     "queryText": "QUICKSTART_AWS_CTA_UsageOfRootAccountSevHigh {source {CloudTrailRawEvents} filter {UPPER(EVENT:userIdentity.\"type\"::String) = 'ROOT' AND EVENT:userIdentity.invokedBy::String IS NULL AND EVENT:eventType::String <> 'AwsServiceEvent' AND ERROR_CODE IS NULL} return distinct {INSERT_ID, INSERT_TIME, EVENT_TIME, EVENT}}"
}
This query checks for use of the
rootuser account.Send the request.
Verify that the response returns a
200 OKstatus code and a response body similar to the one in the following figure: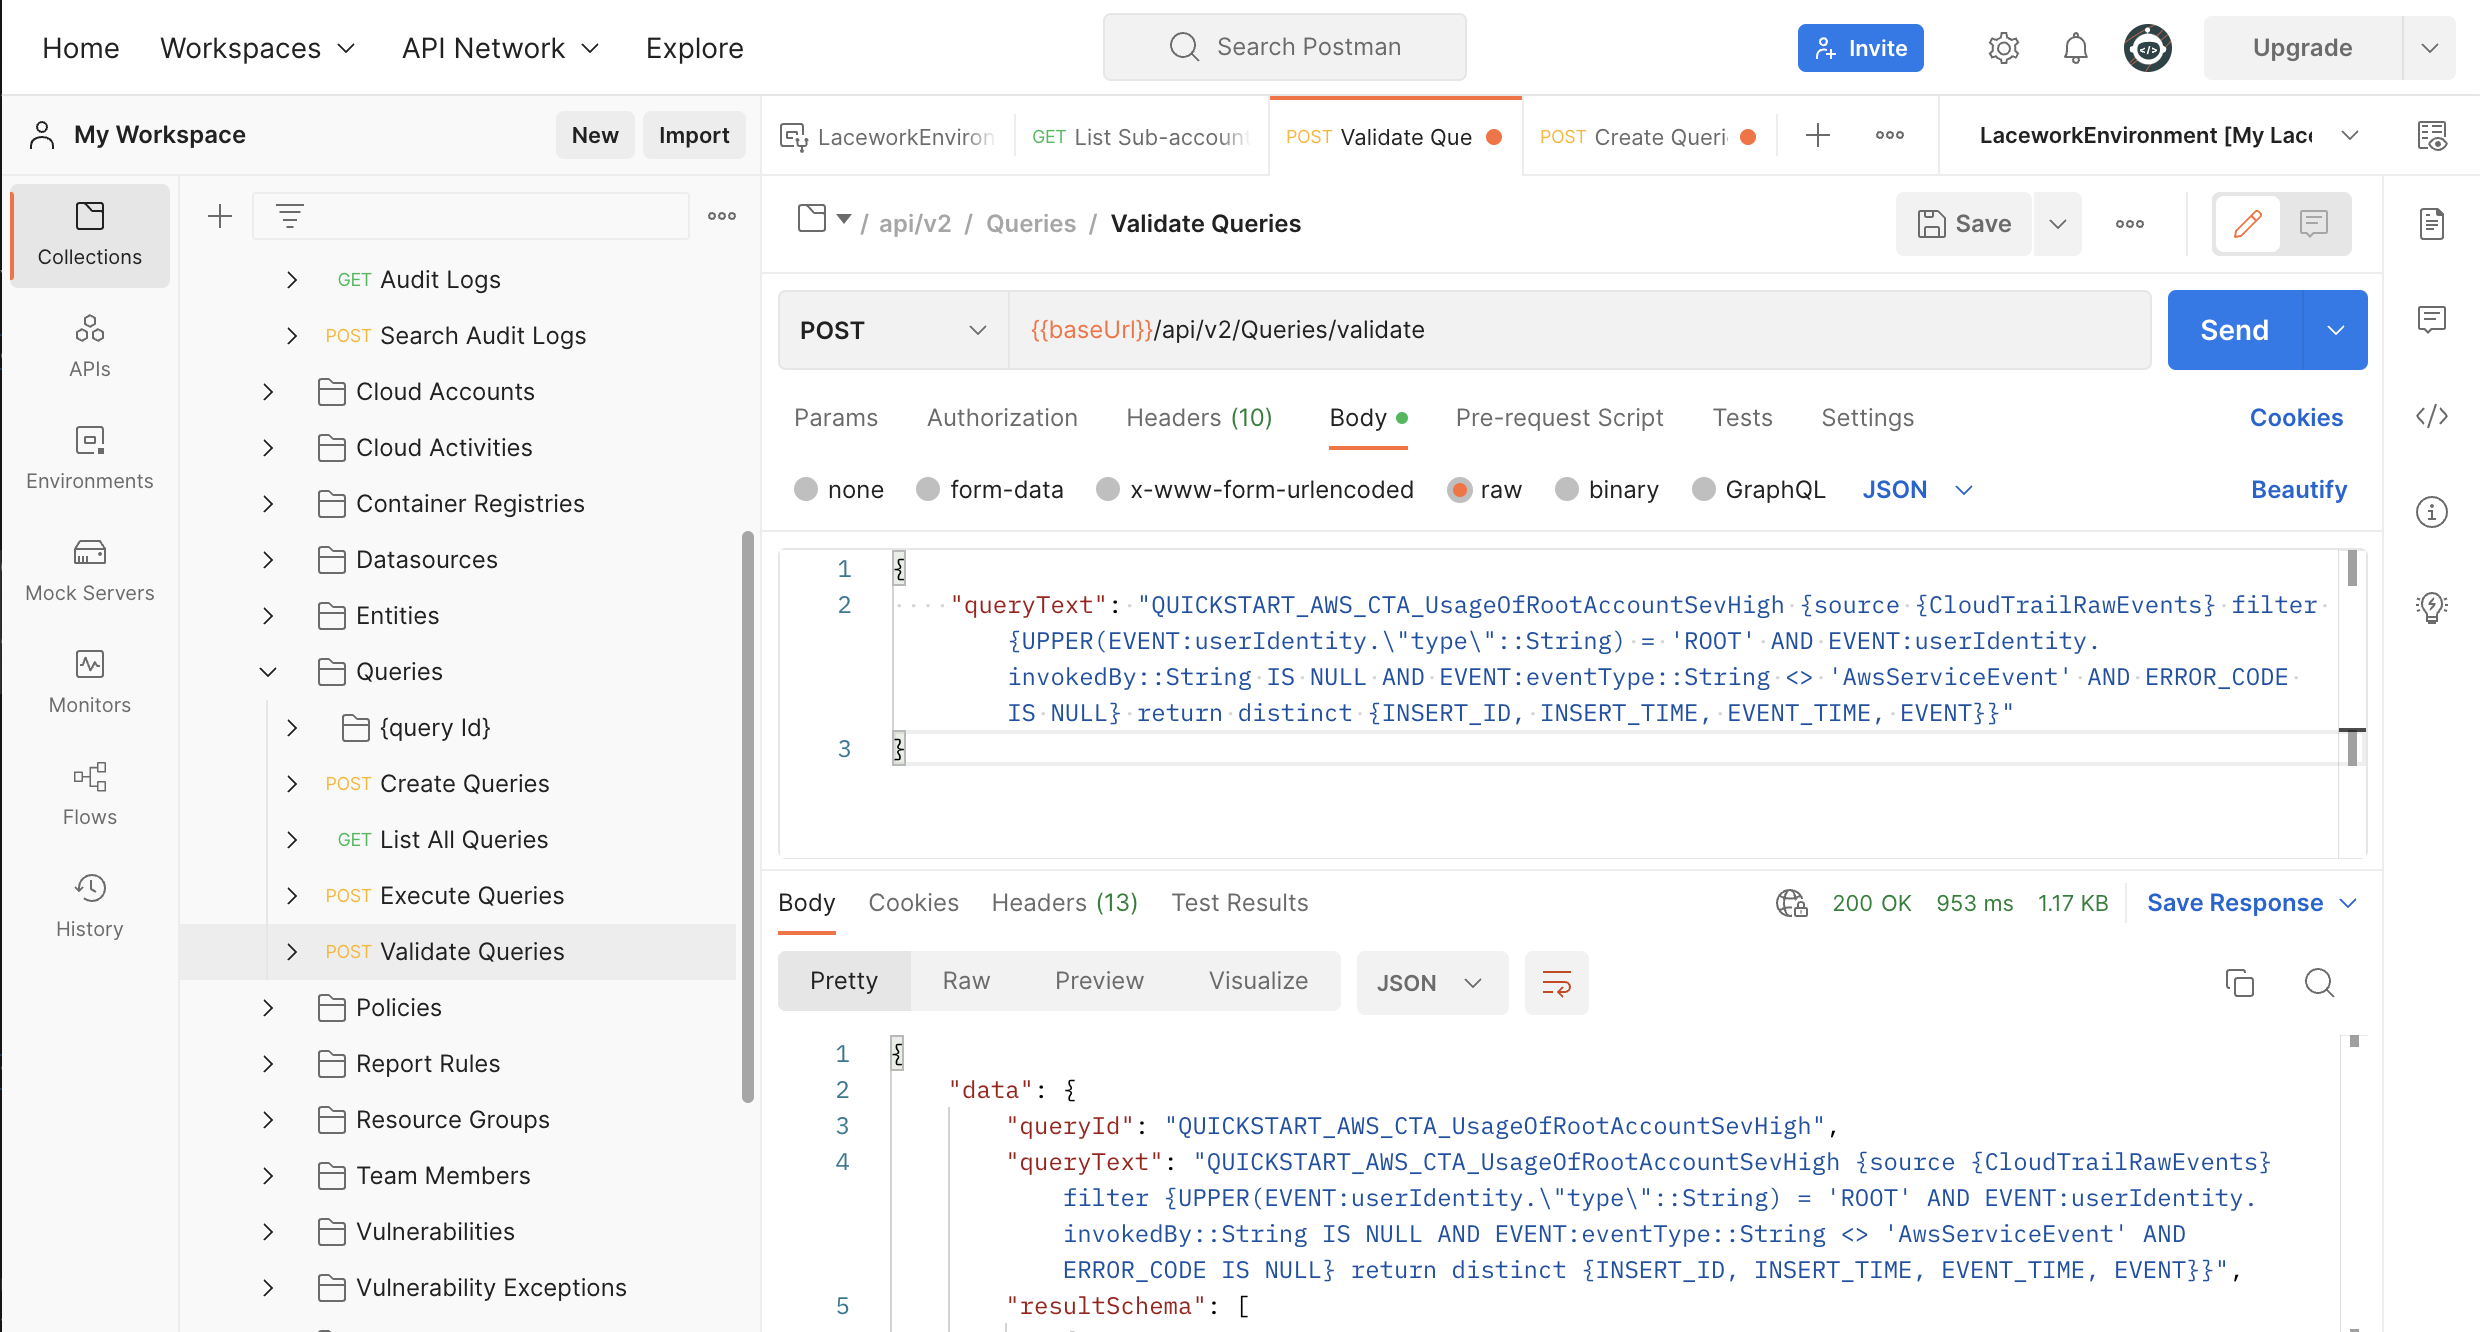
Step 2: Create a Query
In this step, you load your named query on Lacework:
Go to the
POST Create Queriesendpoint.Set the body of the request to the following:
{
    "queryText": "QUICKSTART_AWS_CTA_UsageOfRootAccountSevHigh {source {CloudTrailRawEvents} filter {UPPER(EVENT:userIdentity.\"type\"::String) = 'ROOT' AND EVENT:userIdentity.invokedBy::String IS NULL AND EVENT:eventType::String <> 'AwsServiceEvent' AND ERROR_CODE IS NULL} return distinct {INSERT_ID, INSERT_TIME, EVENT_TIME, EVENT}}",
    "queryId": "QUICKSTART_AWS_CTA_UsageOfRootAccountSevHigh"
}
Send the request.
Verify that the response is as expected and you get a
201 Createdstatus code: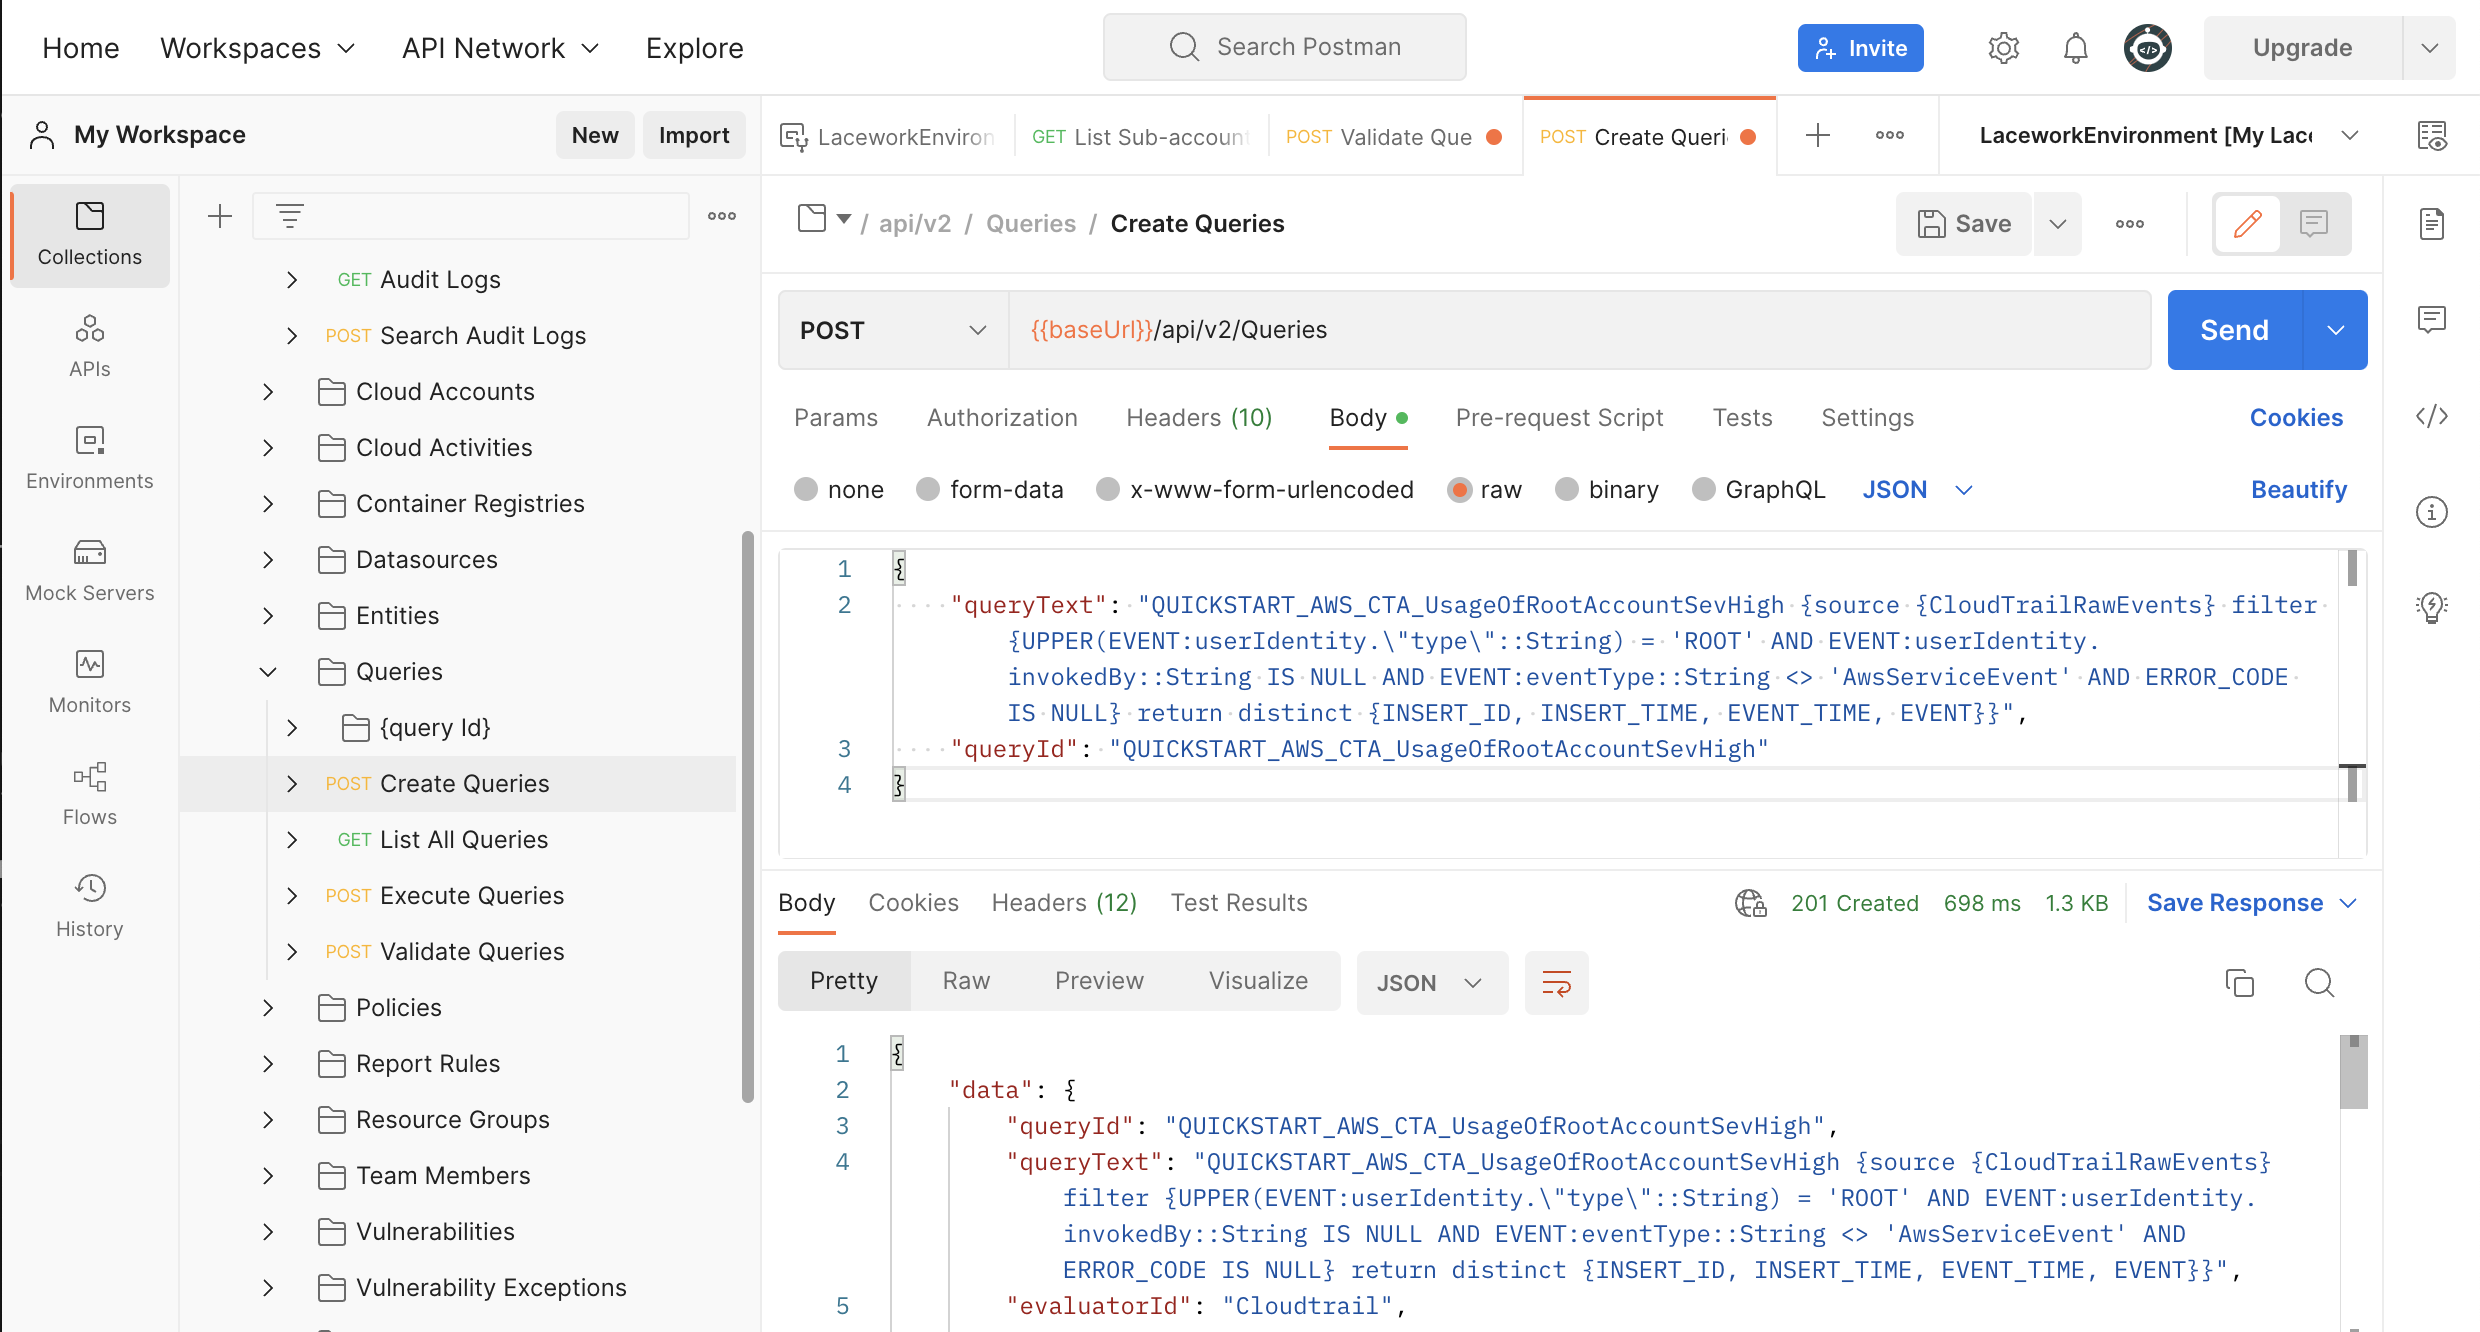
Step 3: Execute the Query
Run the query, as follows:
Under the
{query id}folder, select thePOST Execute Queries by IDendpoint.For the path variable, specify the name of your query,
QUICKSTART_AWS_CTA_UsageOfRootAccountSevHigh, as follows: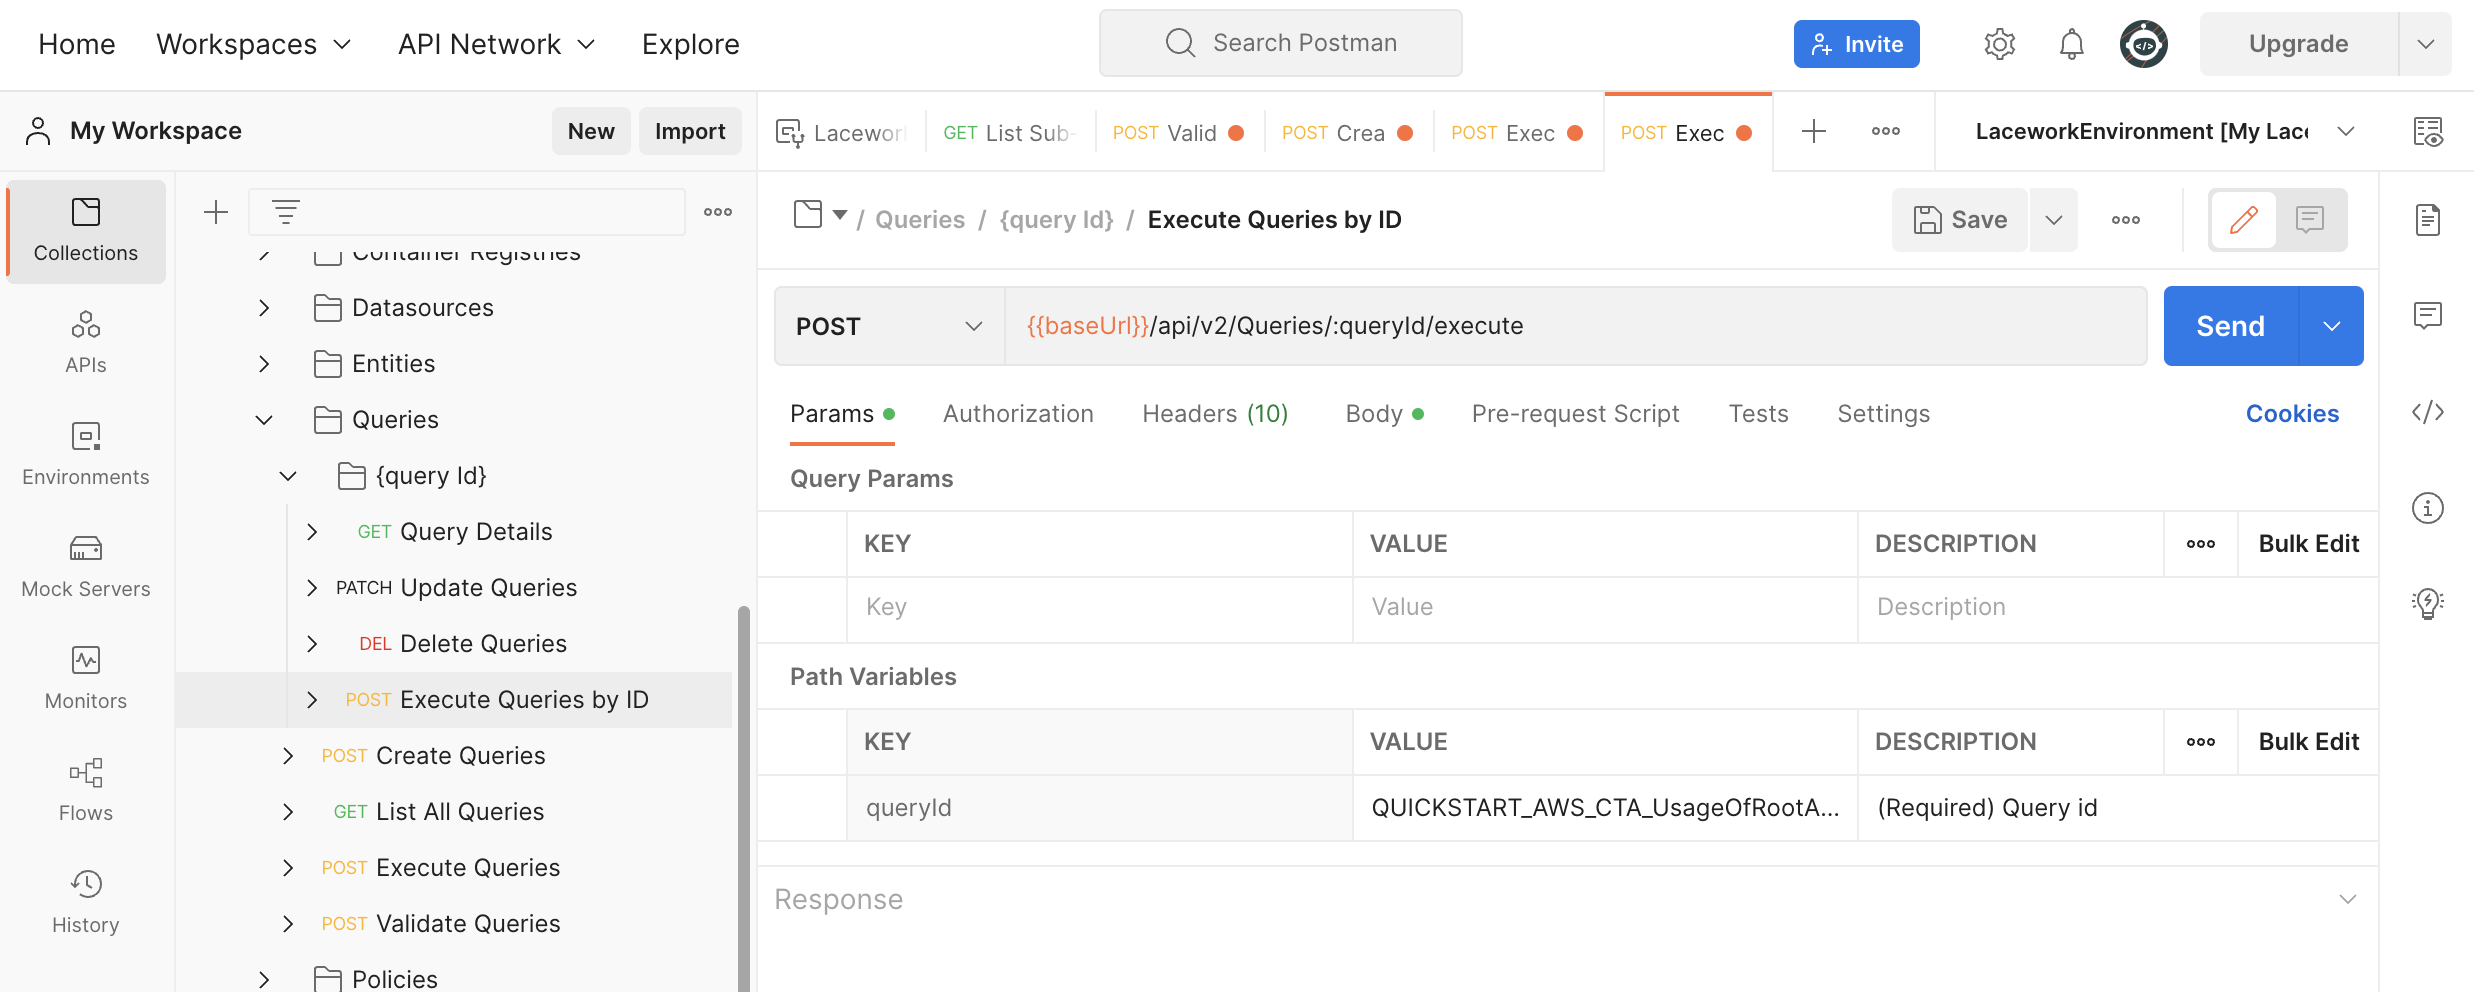
Set the body of the request to the following:
{
    "arguments": [ { "name": "StartTimeRange", "value": "2022-10-19T00:00:00Z" }, { "name": "EndTimeRange", "value": "2022-10-20T00:00:00Z" } ]
}
Adjust the dates specified for the
StartTimeRangeandEndTimeRangeto match the time range during which the activity occurred in your environment.Send the request
Verify the response. If your account is fresh, the result may be empty, as is the case here. Either way, ensure the result is a
200 OKstatus code.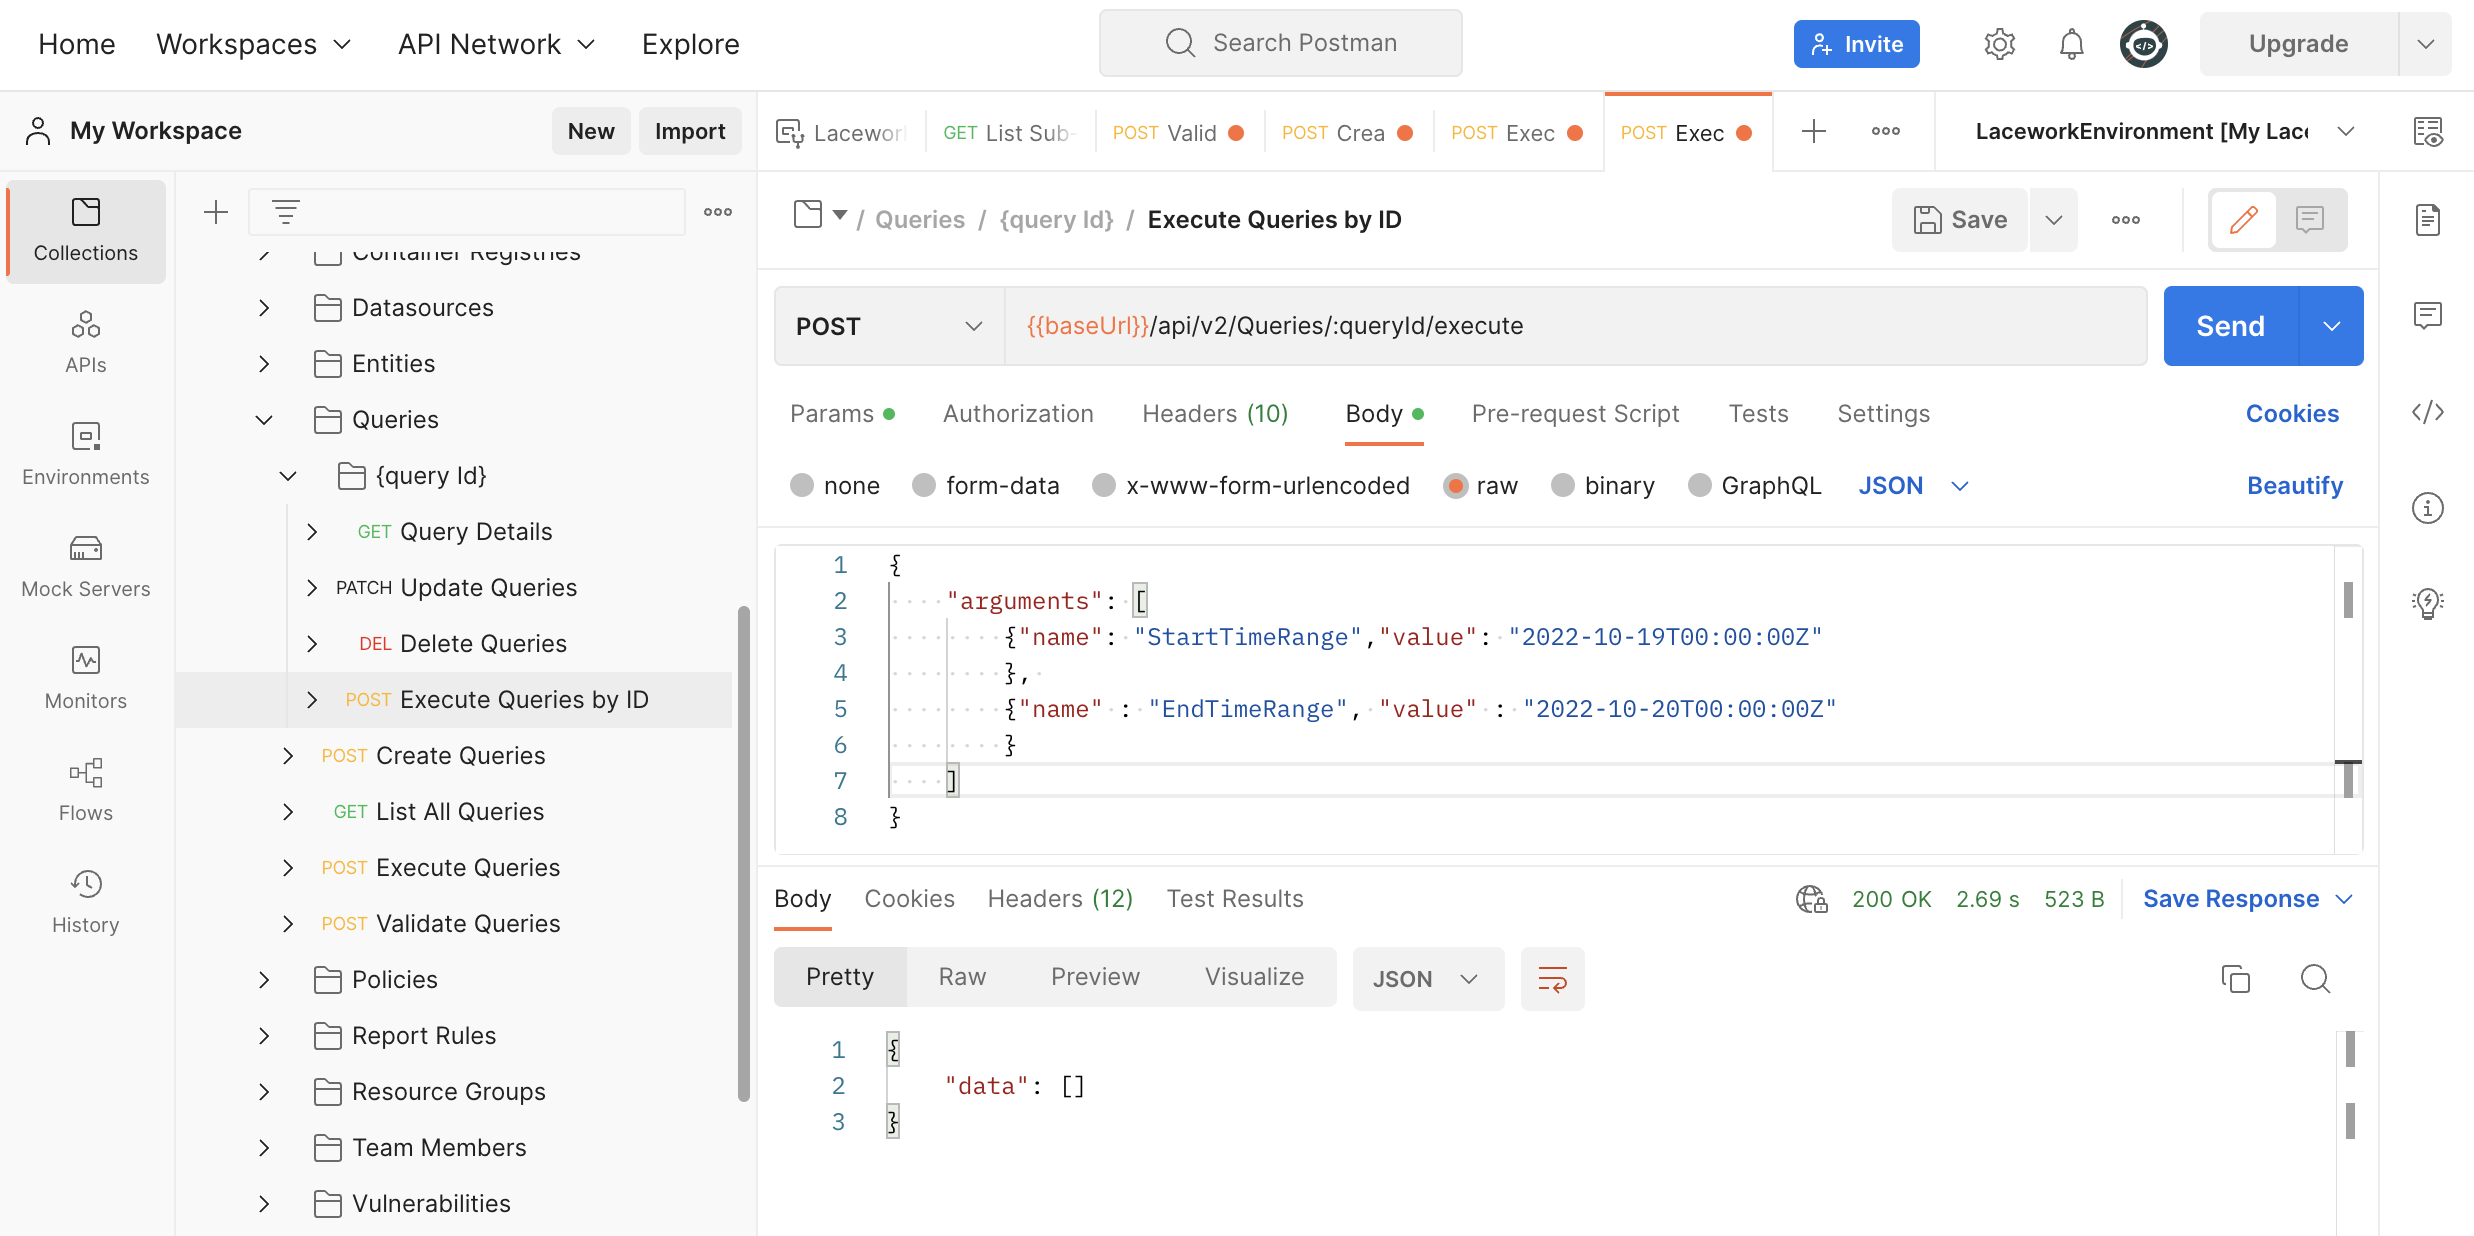
For detailed information on the fields returned, review our Queries API reference documentation.
Next steps
Now that you’ve tested out a simple flow, be sure to:
- Get more familiar with the API by browsing the Lacework API documentation.
- Also, check out the Lacework CLI.