Integrate Lacework with Security in Jira
Overview
Integrate Lacework as a security tool in Atlassian Jira to view container vulnerabilities in the context of your Jira project and issues.
Choose the repositories that hold your active container images to list vulnerabilities in the Jira Security tab.
You can then track and delegate the work to remediate these vulnerabilities using Jira workflows.
Learn more about the benefits of the Lacework Vulnerability Application in our Lacework Blog.
How It Works
After integration, Lacework shares data with Jira for container vulnerabilities found on active images. The data includes information about each vulnerability such as the CVE ID, severity, vulnerable package versions, and more.
The Jira security tool is then used to create issues that contain all the relevant data about the vulnerability without manual input.
Comparison to Jira Alert Channel
This tool is separate to the Jira Alert Channel integration and functions as a unidirectional data share (Lacework → Jira).
Prerequisites
This integration is for Jira Cloud only.
Before you integrate Lacework with Security in Jira, ensure that you are scanning the active images in your environment. This can be achieved through any of the Lacework scanners. See Different Types of Scanning for details.
Active container images in your environment can be detected by Lacework agents installed on hosts (with running containers) or Agentless Workload Scanning integrations. See What is an active image / container? for additional information.
Integrate Lacework as a Security Tool in Jira
To complete the tasks required to integrate Lacework as a security tool in Jira, you must have the following permissions:
- Account Admin in Lacework Console.
- Jira administrator permission.
- If you don't have the appropriate permissions, you can still place a request for the application to be installed in step 2. You will need to wait for your Jira administrator to accept the request before continuing though.
1. Generate an Access Token in the Lacework Console
- In the Lacework Console, go to Settings > Integrations: Security in Jira.
- Click Integrate Security in Jira to generate an access token.
- Once the token is generated, download the token in JSON format (
credentials.json) or copy it to your clipboard.
2. Configure the Lacework Security Application in Jira
In the Atlassian Marketplace in Jira, select the Find new apps tab and locate the Lacework Security in Jira app.
Click the Buy now or Free trial option.
On the Manage apps tab, click Configure on the Lacework Security in Jira app (under User-installed apps).
Enter your Lacework account name.
tipYour account name can be found as part of the URL used to access your Lacework Console. For example, if your URL is
https://specializedsoftware.lacework.net, enter specializedsoftware as the account name (always exclude.lacework.netandhttps://when entering the account name).Enter the Lacework access token in that was generated earlier.
Click Submit.
This will enable Lacework to begin sending vulnerabilities from your active images to Jira.
Work with Vulnerabilities in Jira
The tasks in this section require that you have the following permissions at a minimum:
Select Image Repositories to Monitor in Jira
- Click the Project settings for your desired project.
- Click the Toolchain tab.
- Click the + icon and use the Toolchain search and Workspaces selection options to find the repository that you want to add.
- Click Add container once you have selected the repository.
Repeat these steps for any repositories that you want to monitor in Jira.
List Active Container Images In Lacework Console
To list all your active container images from a repository, click on the repository name in the Toolchain list.
This will open a new tab to the container vulnerability page in your Lacework Console (with the repository name as an active filter).
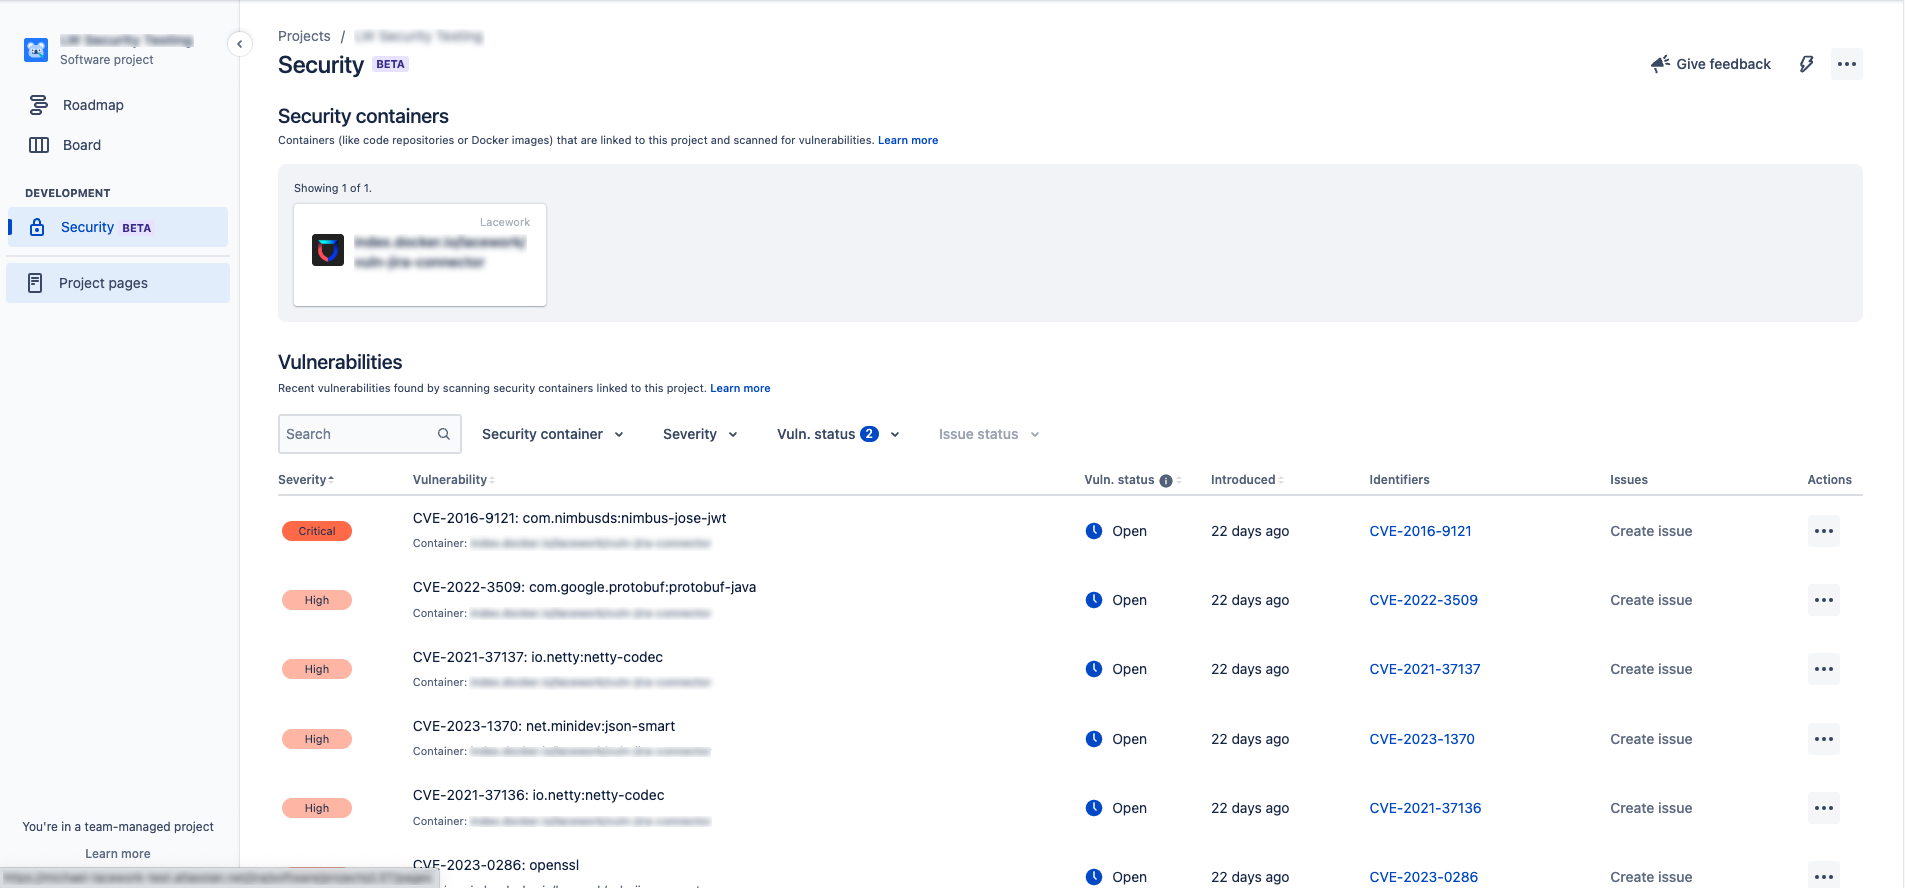
View Image Repositories and Vulnerabilities in the Security Tab
Ensure that you have enabled the Security feature in Jira before proceeding.
Click the Security tab for the desired project.
The Security containers section will be populated with your repositories (added through the Toolchain). The Vulnerabilities section displays vulnerabilities found in your active container images.
Create or Link Jira Issues from Vulnerabilities
Use these steps to create or link tickets to help prioritize and track the remediation progress of vulnerabilities using Jira workflows.
To create a ticket from a vulnerability:
- In the Security tab, identify the vulnerability that you want to create a Jira issue for in the Vulnerabilities table.
- Click Create issue (in the Issues column) for the vulnerability that you want to create a task for.
- In the Create issue window, the description for the issue will be filled with the details of the vulnerability. Add anything else as needed, and click Create.
Alternatively, if you have already created an issue to track certain vulnerabilities:
- Click the ... icon (in the Actions column).
- Click the Link issue option.
- Search for your issue and click Link.
- When viewing the Jira ticket, note that the Security field in Details will state the number of vulnerabilities linked to this issue. You can click the dropdown icon to view each one.